如何通过基于OAuth的API连接Vue.js
很多人都使用过基于OAuth的API,比如你在一些网站使用GitHub登录的时候,你就使用GitHub提高的OAuth2 API,或者你使用Google或者Facebook登录的时候,你也会使用到它。
现在OAuth真的无处不在,也许因为它真的非常好,用户只要点一个按钮,然后得到权限,这样就可以了。
但是当我们进行开发它的时候,就是另外 一个故事了,也许是因为它一次性引入了太多的新的内容。本文我们会介绍一个小的工具Bearer.sh Pizzly,有了它之后开发OAuth就方便多了。
首先来看看它长什么样子:
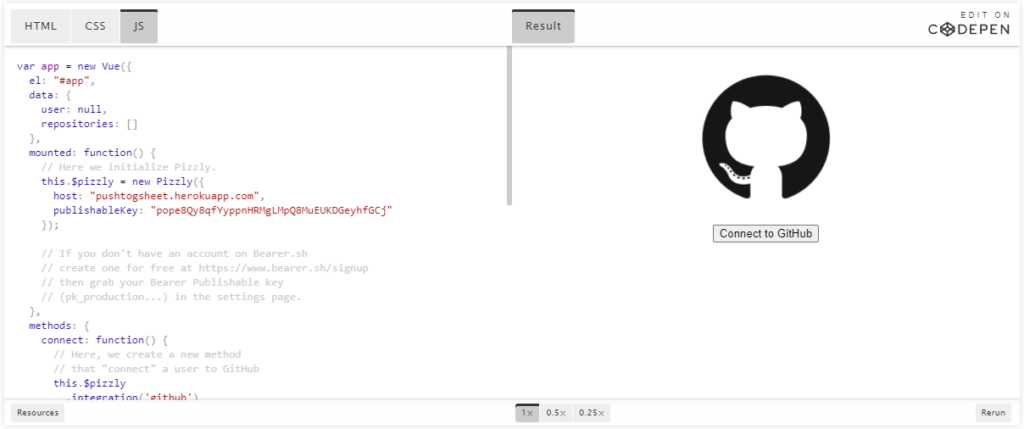
下面我们来看看如何使用它。
Vue.js skeleton
为了学习如何使用基于OAuth的API,我们首先需要一个Vue.js skeleton,或者至少需要一个能使用OAuth2 API的应用。
假如你已经有了GitHub的账户,我们可以使用它的API,当然别的基于OAuth的API也是可以的。
GitHub API提供了一个端口(/user/starred)列出了用户的所有的repositories。这个端口是需要authentication的,所以听起来是一个很好的使用场景。
下面是一个简单的应用代码:
<!DOCTYPE html>
<html>
  <body>
    <div id="app">
      <main v-if="user">
        <h1>Latest repositories starred</h1>
        <ul>
          <li v-for="repository in repositories">
            <a :href="repository.html_url" target="_blank">{{repository.name}}</a>
          </li>
        </ul>
        <p v-if="repositories.length === 0">Whoa, such empty!</p>
      </main>
      <div v-else>
        <button @click.prevent="connect">Connect to GitHub</button>
      </div>
    </div>
<!-- Pizzly.js -->
    <script src="https://cdn.jsdelivr.net/npm/pizzly-js@v0.2.7/dist/index.umd.min.js"></script>
<!-- Vue.js (developement) -->
    <script src="https://cdn.jsdelivr.net/npm/vue/dist/vue.js"></script>
    <script>
      var app = new Vue({
        el: '#app',
        data: {
          user: null,
          repositories: []
        }
      })
    </script>
  </body>
</html>
这个应用代码是一个很简单的Vue.js,假如user变量已经设置了,就会显示repositories的内容个,否则就要求用户连接GitHub。
认证的部分
我们使用开源的Pizzly,它使用了.connect的方法来从前端触发认证。我们来看看如何在上面代码中加入这个内容:
var app = new Vue({
  el: "#app",
  data: {
    user: null,
    repositories: []
  },
  mounted: function() {
    // Here we initialize Pizzly.
    this.$pizzly = new Pizzly({
      host: "pushtogsheet.herokuapp.com",
      publishableKey: "pope8Qy8qfYyppnHRMgLMpQ8MuEUKDGeyhfGCj"
    });
// I'm using my own instance of Pizzly which is hosted on Heroku.
    // Create yours for free and in a few clicks by following
    // https://github.com/Bearer/Pizzly#getting-started
  },
  methods: {
    connect: function() {
      // Here, we create a new method
      // that "connect" a user to GitHub
      this.$pizzly
        .integration('github')
        .connect()
        .then(this.connectSuccess)
        .catch(this.connectError);
    },
    connectSuccess: function(data) {
      // On success, we update the user object
      this.user = data.authId;
      console.log('Successfully logged in!')
    },
    connectError: function (err) {
      console.error(err)
      alert("Something went wrong. Look at the logs.")
    }
  }
});
是不是很简单,只要几行代码就完成了。
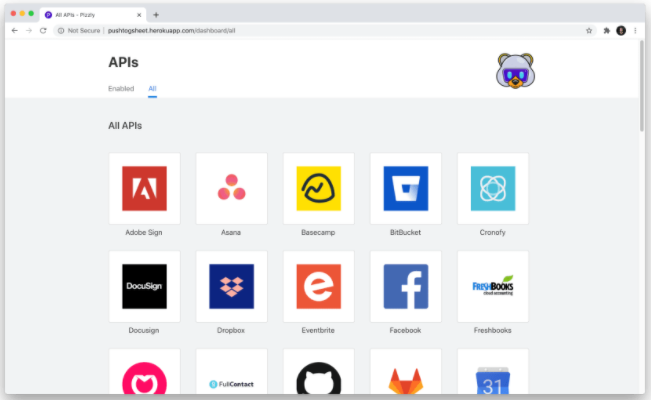
配置部分
在上面的代码中有一个最重要的部分就是Pizzly的初始化,这里就要提到Pizzly其实需要一个Oauth Manager,也就是说你需要把它托管在某一个地方,比如Heroku等。当这个托管完成之后,你就可以使用Pizzly的仪表板了,这也是你配置你的GitHub的地方:
总结
这样你就可以在Vue.js中使用任何基于OAuth的API了,关于任何Pizzly的意见,欢迎大家提出。
参考文章:https://hackernoon.com/connecting-vuejs-with-oauth-based-api-ks1v3ucj


Recent Comments